Are you tired of your outdated bathroom countertops but don’t want to break the bank on a full renovation? Painting bathroom countertops has emerged as a cost-effective and creative way to revamp your space without the hassle of replacing the entire surface. Whether you’re dealing with a dull laminate finish or chipped tiles, a fresh coat of paint can work wonders. This guide will walk you through everything you need to know to achieve a professional-looking finish, from preparation to sealing, while ensuring your project meets the highest standards of durability and aesthetics.
Painting bathroom countertops is not just about saving money—it’s about personalizing your space. With the right techniques, you can mimic the appearance of high-end materials like marble or granite, all while staying within your budget. This process is surprisingly accessible for DIY enthusiasts, requiring only a few tools and materials. However, it’s crucial to approach the project with care, as bathroom surfaces are exposed to moisture and wear. By following expert advice and using the proper materials, you can ensure your newly painted countertops stand the test of time.
As we dive deeper into this topic, you’ll learn about the essential steps, common mistakes to avoid, and creative ideas to make your bathroom countertops truly unique. Whether you’re a seasoned DIYer or a beginner looking to tackle your first home improvement project, this article will equip you with the knowledge and confidence to transform your bathroom countertops into a stunning focal point. Let’s explore how painting bathroom countertops can elevate your space and provide lasting satisfaction.
Read also:Unveiling The Life And Achievements Of Leonard Downs A Comprehensive Overview
Table of Contents
- Is Painting Bathroom Countertops Worth It?
- How to Prepare Your Countertop for Painting
- Step-by-Step Guide to Painting Bathroom Countertops
- What Are the Best Paints and Materials to Use?
- How to Seal and Protect Your Painted Countertop
- Common Mistakes to Avoid When Painting Countertops
- Creative Ideas for Painting Bathroom Countertops
- FAQs About Painting Bathroom Countertops
Is Painting Bathroom Countertops Worth It?
Before diving into the process of painting bathroom countertops, it’s essential to evaluate whether this project aligns with your goals and expectations. For many homeowners, the decision to paint countertops stems from a desire to refresh their bathroom without the expense and disruption of a full remodel. While painting bathroom countertops may not replicate the exact feel of natural stone or solid surfaces, it offers a budget-friendly alternative that can yield impressive results when done correctly.
One of the most significant advantages of painting bathroom countertops is its versatility. Whether you’re aiming for a sleek, modern look or a rustic, vintage vibe, paint can be customized to suit your preferences. Additionally, painting allows you to experiment with colors and patterns that might otherwise be cost-prohibitive. For example, you can achieve the appearance of marble or granite using specialized techniques, giving your bathroom a high-end aesthetic without the hefty price tag.
However, it’s important to weigh the pros and cons. While painting bathroom countertops is an excellent way to refresh your space, it may not be as durable as solid materials like quartz or granite. To ensure longevity, proper preparation and sealing are crucial. If you’re willing to invest time and effort into the process, painting bathroom countertops can be a rewarding and worthwhile project that transforms your bathroom into a stylish sanctuary.
How to Prepare Your Countertop for Painting
Proper preparation is the foundation of a successful countertop painting project. Without adequate preparation, even the best paint and techniques can fail to deliver the desired results. The first step is to thoroughly clean the surface to remove dirt, grease, and grime. A mixture of mild dish soap and warm water works well for most surfaces, but for tougher stains, consider using a degreaser or a specialized cleaning solution designed for countertops.
Once the surface is clean, it’s time to address any imperfections. Sanding is a critical step in the preparation process, as it creates a smooth and even base for the paint to adhere to. Use fine-grit sandpaper (around 220 grit) to gently scuff the surface, ensuring you don’t damage the underlying material. After sanding, wipe away any dust with a damp cloth and allow the surface to dry completely before proceeding.
For added durability, consider applying a bonding primer. This step is especially important for non-porous surfaces like laminate or tile, as it enhances adhesion and ensures the paint adheres evenly. Allow the primer to dry according to the manufacturer’s instructions before moving on to the painting phase. By taking the time to prepare your countertop properly, you’ll set the stage for a flawless and long-lasting finish.
Read also:Discover The Best Vinton Restaurants Iowa Has To Offer
Step-by-Step Guide to Painting Bathroom Countertops
With your countertop prepped and ready, it’s time to dive into the painting process. This step-by-step guide will walk you through each stage of painting bathroom countertops, ensuring a professional-quality result.
Step 1: Choose the Right Paint
Selecting the appropriate paint is crucial for achieving a durable and attractive finish. For bathroom countertops, epoxy-based paints or enamel paints are highly recommended due to their water-resistant properties and ability to withstand daily wear and tear. These paints are specifically formulated to adhere to surfaces like laminate, tile, and even wood, making them ideal for this type of project.
Step 2: Apply the Base Coat
Begin by applying a thin, even layer of your chosen paint using a high-quality foam roller or brush. Avoid overloading the surface with paint, as this can lead to drips and uneven coverage. Allow the base coat to dry completely before applying additional layers. Depending on the paint you choose, you may need to apply two to three coats for optimal coverage and durability.
Step 3: Add Texture or Patterns (Optional)
If you’re aiming for a more decorative look, consider adding texture or patterns to mimic materials like marble or granite. This can be achieved using techniques such as sponging, feathering, or freehand painting. For a marble effect, lightly dab a sponge dipped in a contrasting color onto the surface, blending the edges for a natural appearance. Allow the design to dry completely before proceeding to the next step.
Step 4: Seal the Surface
Once the paint is dry, sealing is essential to protect your newly painted bathroom countertops from moisture and daily use. Use a clear, water-based polyurethane sealer or a specialized countertop sealant to create a durable, waterproof barrier. Apply the sealer in thin, even layers, allowing each layer to dry before adding the next. This step not only enhances durability but also adds a polished, professional finish to your project.
What Are the Best Paints and Materials to Use?
Choosing the right materials is a critical factor in the success of your painting bathroom countertops project. With so many options available, it can be overwhelming to determine which products are best suited for your needs. Here, we’ll break down the top choices for paints, primers, and sealants to ensure your project achieves the desired results.
Epoxy Paints
Epoxy paints are a popular choice for bathroom countertops due to their exceptional durability and resistance to moisture. These paints are typically two-part systems that require mixing before application, creating a hard, glossy finish that can withstand daily use. While epoxy paints may require a bit more effort to apply, their long-lasting performance makes them a worthwhile investment for high-traffic areas like bathrooms.
Enamel Paints
Enamel paints are another excellent option for painting bathroom countertops. Known for their smooth, glossy finish, enamel paints provide a professional look that mimics the appearance of natural stone or solid surfaces. They are also highly resistant to scratches and stains, making them ideal for countertops that see frequent use. For best results, choose a water-based enamel paint, as it is easier to clean up and emits fewer fumes than oil-based alternatives.
Primer and Sealant Options
In addition to paint, selecting the right primer and sealant is crucial for ensuring a durable and long-lasting finish. A bonding primer, such as Zinsser Bulls Eye 1-2-3, is highly recommended for countertops, as it enhances adhesion and provides a smooth base for painting. For sealing, opt for a clear, water-based polyurethane sealer or a specialized countertop sealant that offers both waterproofing and UV protection. These products will help protect your painted surface from moisture, heat, and daily wear.
How to Seal and Protect Your Painted Countertop
Sealing is a crucial step in the process of painting bathroom countertops, as it ensures your newly painted surface remains durable and resistant to daily wear. Without proper sealing, the paint may chip, peel, or become damaged over time, especially in a high-moisture environment like a bathroom. To achieve the best results, follow these steps for sealing and protecting your painted countertop.
Choosing the Right Sealant
When selecting a sealant, opt for a product specifically designed for countertops or high-traffic surfaces. Clear, water-based polyurethane sealers are an excellent choice, as they provide a durable, waterproof barrier while maintaining the appearance of the paint. Alternatively, you can use a specialized countertop sealant that offers additional UV protection and resistance to heat and chemicals. Always read the manufacturer’s instructions to ensure compatibility with your chosen paint.
Applying the Sealant
To apply the sealant, use a high-quality foam brush or roller to ensure an even, streak-free finish. Begin by applying a thin, even layer of sealant, working in small sections to avoid drips or pooling. Allow the first layer to dry completely before applying additional coats. For optimal durability, apply at least two to three layers of sealant, sanding lightly between coats with fine-grit sandpaper to remove any imperfections. This step will create a smooth, polished surface that enhances the longevity of your painted countertop.
Common Mistakes to Avoid When Painting Countertops
While painting bathroom countertops is a rewarding DIY project, it’s easy to make mistakes that can compromise the final result. By being aware of these common pitfalls, you can avoid costly errors and ensure your project is a success.
Skipping Surface Preparation
One of the most frequent mistakes is neglecting proper surface preparation. Failing to clean, sand, or prime the countertop can lead to poor adhesion, resulting in peeling or chipping paint. Always take the time to prepare the surface thoroughly, as this step is the foundation of a durable finish.
Using the Wrong Paint
Another common error is using paint that isn’t suitable for countertops. Regular wall paint, for example, lacks the durability and moisture resistance needed for bathroom surfaces. Always choose epoxy or enamel paints specifically designed for high-traffic areas to ensure longevity.
Overlooking Sealing
Skipping the sealing step is another critical mistake. Without a protective sealant, the painted surface is vulnerable to moisture, stains, and wear. Always seal your painted countertop with a high-quality, waterproof sealant to enhance durability and maintain its appearance over time.
Creative Ideas for Painting Bathroom Countertops
Painting bathroom countertops offers endless opportunities for creativity and personalization. Whether you’re aiming for a bold statement or a subtle update, here are some inspiring ideas to transform your countertops into a unique focal point.
Mimicking Natural Stone
One popular technique is to replicate the appearance of natural stone, such as marble or granite, using paint. Start with a base coat in a neutral color, then add veins and patterns using contrasting shades. Use a feathering technique to blend the colors seamlessly, creating a realistic and luxurious look.
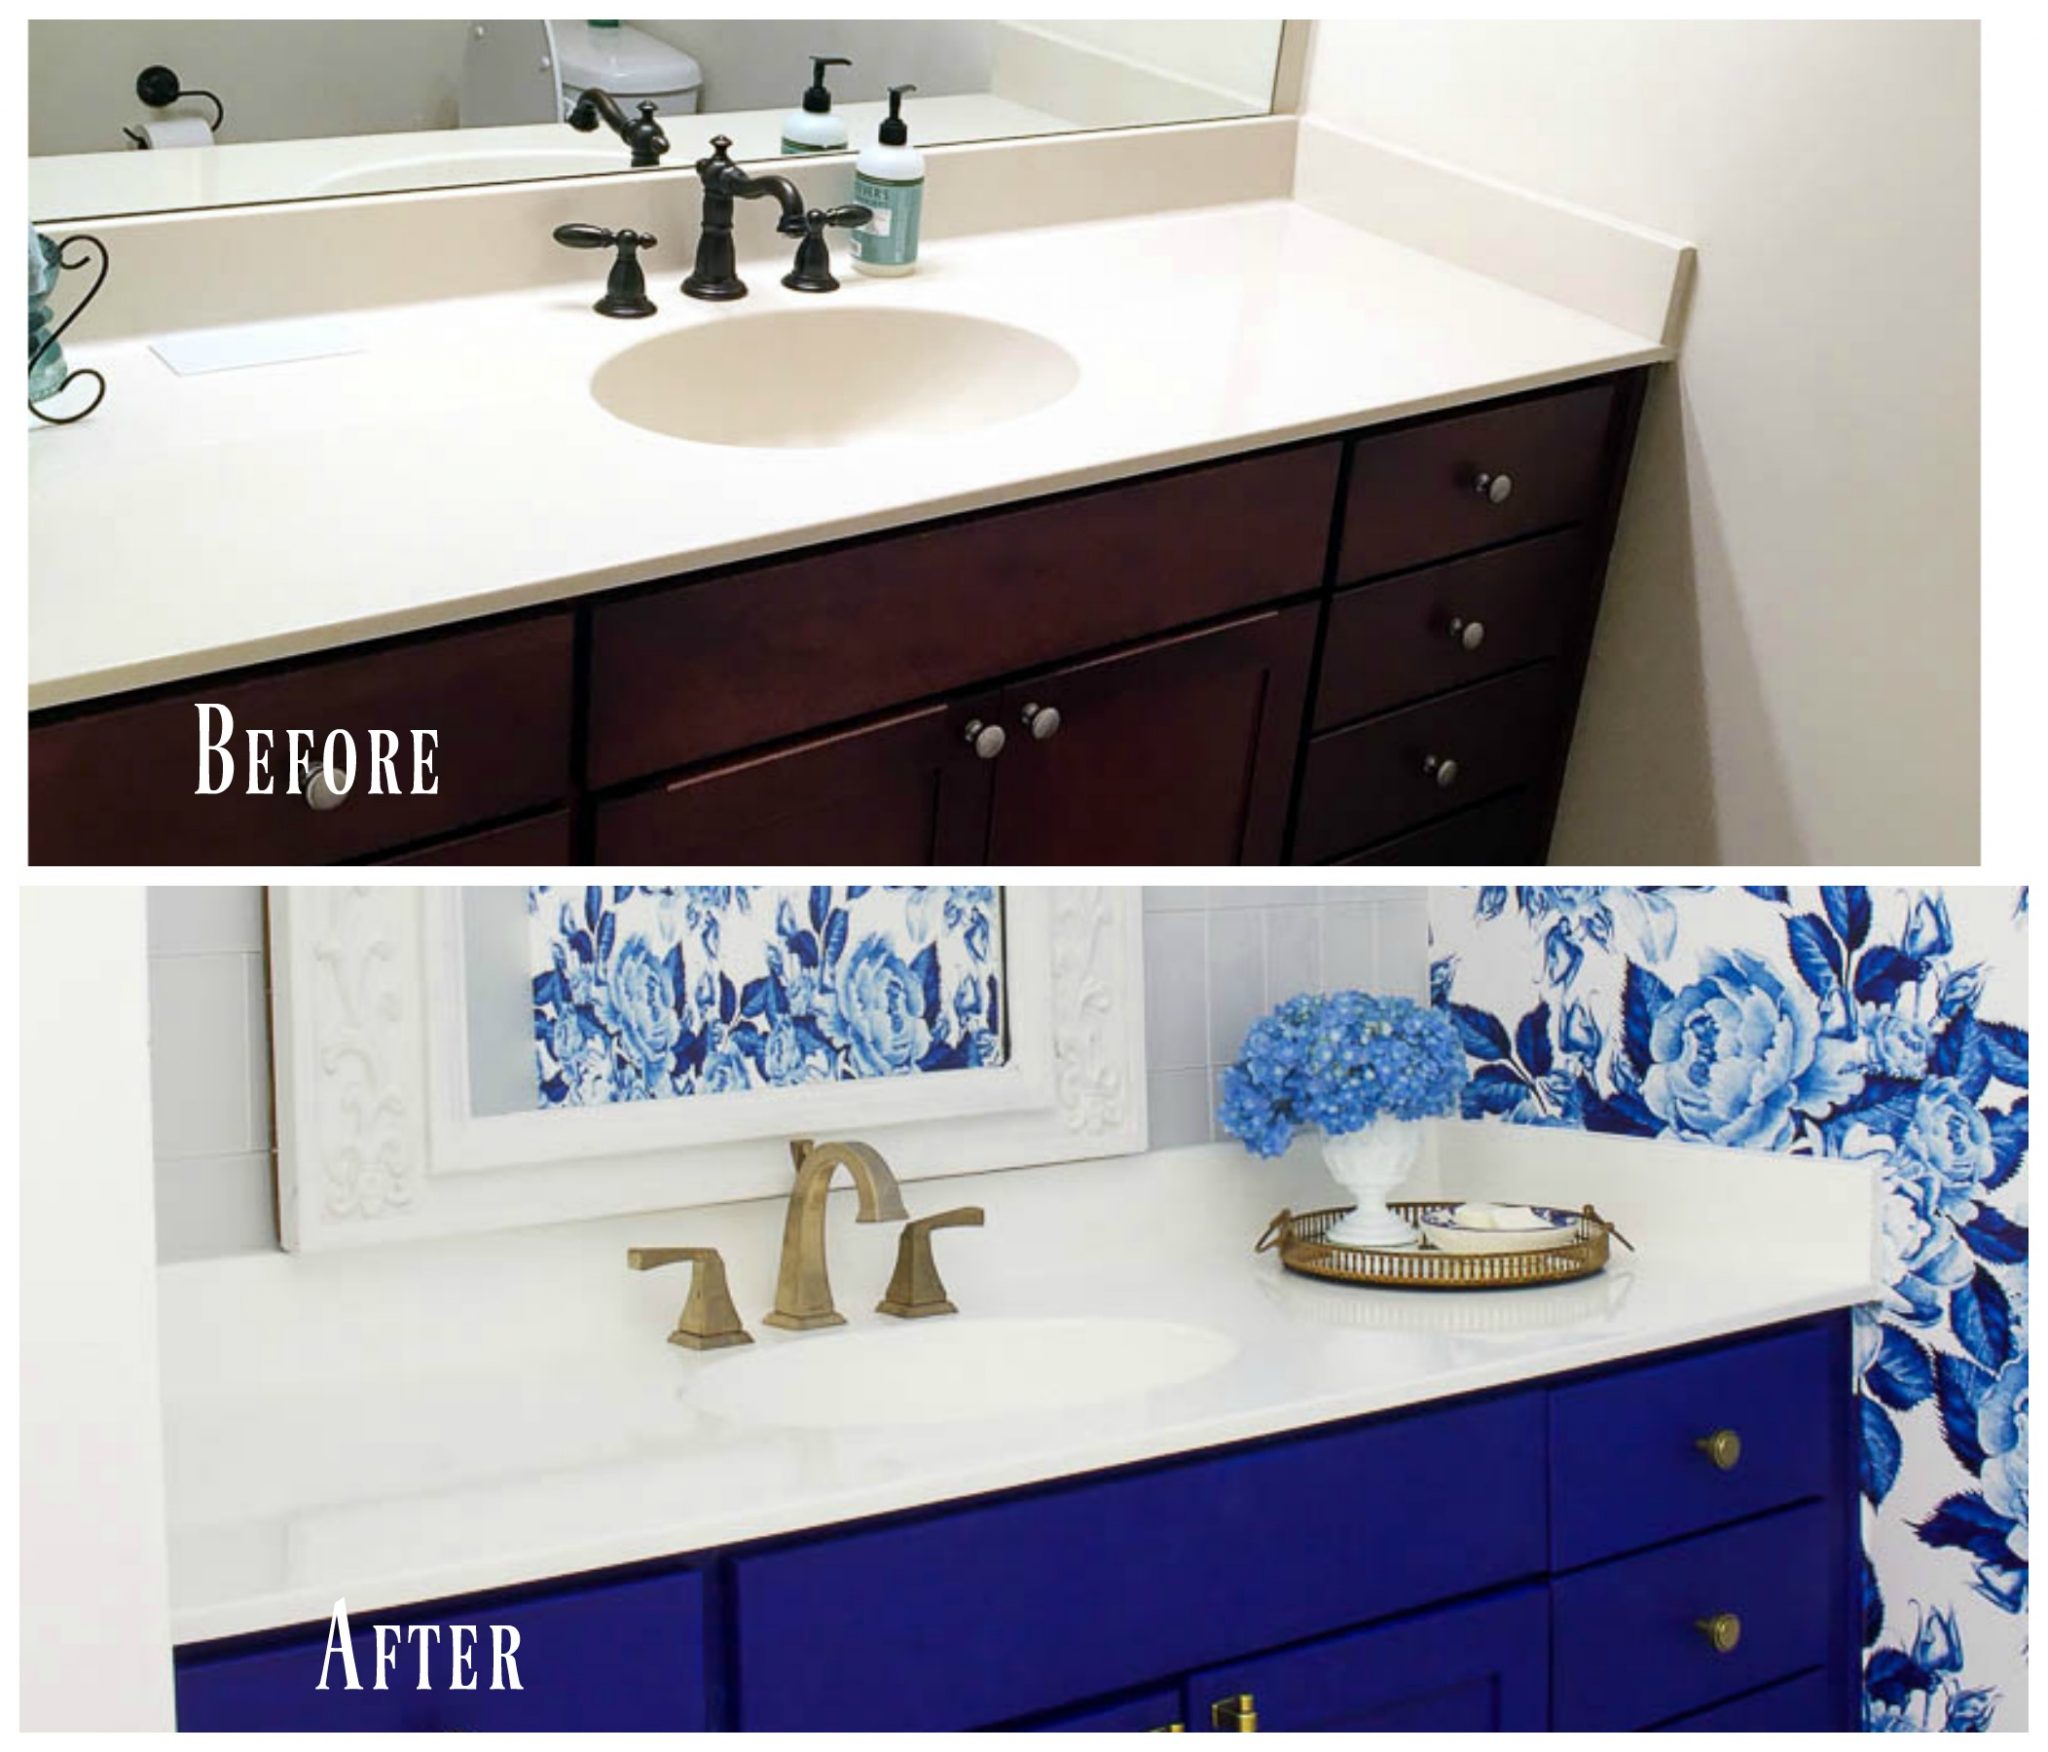
Adding a Pop of Color
For a vibrant and modern twist, consider painting your countertops in a bold color like navy blue, emerald green, or deep burgundy. Pair the bold hue with complementary accessories, such as matching towels or decorative accents, to create a cohesive and stylish bathroom design.
Creating a Rustic Finish
If you prefer a more rustic